Author: Content Creator

  • How to Tattoo Inner Lip & Middle Lip: A Professional’s Guide to Safe and Effective Practices

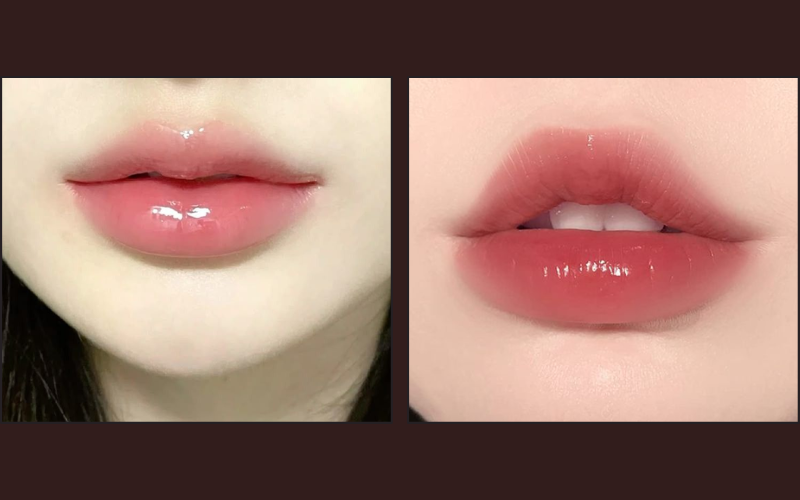
    Inner and middle lip tattoos have surged in popularity, offering a discreet yet edgy form of self-expression. Their unique placement and temporary visibility make them a sought-after option for many. However, executing these intricate designs safely and effectively demands a deep understanding of oral anatomy, specialized techniques, and meticulous aftercare. For artists venturing into this niche, mastering how to tattoo middle and inner lip goes beyond typical body art principles.

    This guide is your essential resource, built to empower tattoo artists with the knowledge needed to approach oral tattoos with confidence and professionalism. We’ll delve into everything from the delicate nature of the mucosal tissue to advanced tattooing methodologies, ensuring client safety, maximizing ink longevity, and achieving client satisfaction. Get ready to explore the intricacies of this fascinating aspect of permanent makeup lips.

    Understanding the Anatomy of the Inner Lip

    To successfully tattoo inside the mouth, a thorough understanding of its unique anatomy is paramount. The inner lip is primarily composed of mucous membrane, a very delicate, moist tissue that differs significantly from skin. This tissue is highly regenerative, which is a key reason why oral tattoos tend to fade faster than those on other parts of the body.

    Saliva, a constant presence, plays a dual role. While it helps keep the area moist, it also continuously washes over the tattoo, contributing to the ink dispersion and fading process. The inner lip is rich in blood supply and nerve endings, meaning increased pain sensation and a higher likelihood of bleeding during the tattoo process. This rich vascularity necessitates careful needle depth and angle to prevent excessive trauma.

    The anatomical differences between the inner lip (the labial mucosa that lines the inside of the lips) and the middle lip (the transition zone where the mucous membrane meets the dryer, outer skin of the lip) are crucial. The middle lip may have slightly different characteristics in terms of tissue thickness and regenerative speed, subtly influencing tattoo application and healing time.

    Is Tattooing the Inner Lip Safe? Risks and Considerations

    While aesthetically appealing, inner lip tattoos carry distinct risks that demand careful consideration and professional protocols. Understanding these potential complications is the first step in mitigating them.

    • Infection Risks: The oral cavity harbors numerous bacteria. Introducing a needle creates an open wound, making infection a primary concern. Both bacterial and viral infections are possible without stringent sterile tattooing procedures.
    • Fading and Blurring: Perhaps the most common challenge, inner lip tattoos are known for their propensity to fade or blur due to the rapid regeneration of mucosal tissue and constant exposure to saliva. Managing client expectations about this is vital.
    • Oral hygiene challenges: Proper post-tattoo oral hygiene is critical but can be challenging for clients, impacting healing and infection prevention.
    • Allergic Reactions to Ink: Though rare, clients can experience allergic reactions to tattoo ink components. Thorough client screening is necessary.
    • Potential for Scarring or Tissue Damage: Improper technique, such as incorrect needle depth or excessive passes, can lead to scarring, permanent tissue damage, or blowouts.
    • Client Contraindications: Certain conditions, like active cold sores, gum disease, recent oral surgery, or specific medications, can contraindicate an inner lip tattoo. Always conduct thorough client consultation forms.

    Before the Needle: Client Consultation and Preparation

    The success and safety of an inner lip tattoo begin long before the needle touches the skin. A meticulous client consultation and preparation phase are non-negotiable.

    Begin with thorough client screening questions, delving into their health, current medications, allergies, and any pre-existing oral health issues. It’s imperative to set realistic expectations about the durability and potential fading of oral tattoos. Unlike traditional tattoos, inner lip designs are often semi-permanent at best.

    Obtain informed consent, specifically addressing the unique risks associated with oral tattoos, including fading, infection, and potential discomfort. Provide clear pre-tattoo instructions for clients, emphasizing excellent oral hygiene leading up to their appointment. Finally, ensure your setup is a beacon of sanitation and sterile protocols, with all necessary barrier methods in place to prevent cross-contamination.

    Essential Equipment for Inner Lip Tattooing

    Executing a precise and safe inner lip tattoo requires specialized tools. The right equipment is foundational to successful mucosal tissue tattooing.

    • Needle Selection: Opt for smaller needle sizes and tighter groupings. For lining, tight liners (e.g., 3RL, 5RL) are preferred for precision. If any soft shading is involved, gentle, soft shaders may be considered. The goal is minimal trauma.
    • Machine Types: Rotary machines are generally favored for inner lip work due to their smoother, more consistent hit and less vibration, allowing for finer control. While coils can be used, rotaries often provide a gentler approach suited for delicate oral tissue.
    • Ink Types: Consider using tattoo ink specifically designed for cosmetic procedures or permanent makeup, which often have a finer pigment dispersion. Longevity will still be a factor, but high-quality, reputable ink is paramount for tattoo ink safety.
    • Anesthetic Options: Topical anesthetics can be used, but discuss their legalities and efficacy with your client. Ensure the product is safe for oral use and apply it sparingly.
    • Barrier Methods: Dental bibs, plastic wraps, and disposable barrier sheets are crucial for maintaining a sterile field and protecting the client and workspace from saliva and ink.
    • Proper Lighting and Magnification: An oral tattoo requires exceptional visibility. Use a strong, adjustable light source and consider a magnification lamp or loupes for precise application.

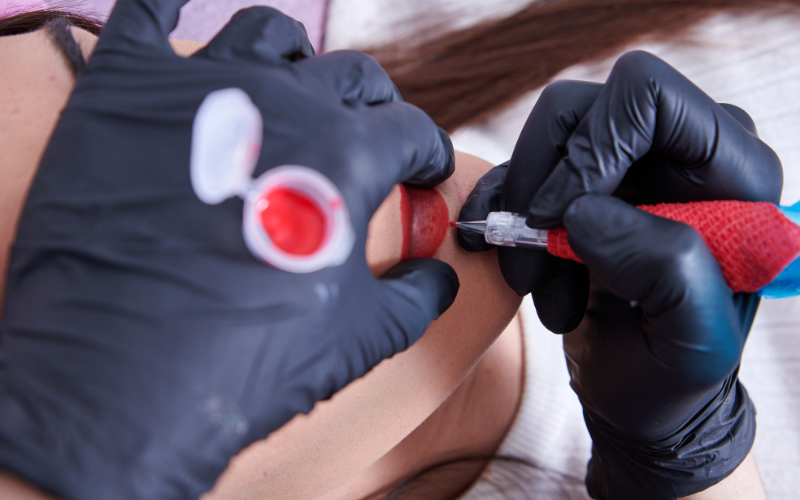
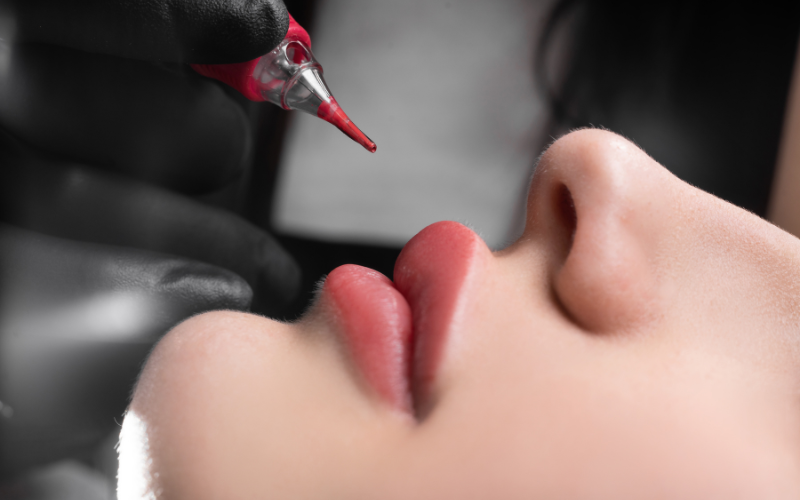
    Step-by-Step: How to Tattoo the Inner Lip

    Mastering the technique for an oral tattoo requires precision and an understanding of how mucosal tissue accepts ink. Here’s a structured approach on how to tattoo middle and inner lip:

    1. Client Positioning: Position the client comfortably with their head supported, allowing for optimal visibility and stability of the lip.
    2. Stenciling Techniques: Traditional stencils rarely adhere to moist mucous membranes. Freehand drawing with a non-toxic surgical marker is common. Some artists may use a very thin layer of tattoo stencil solution temporarily, or create a simple outline from memory or a reference image.
    3. Skin Stretching and Stabilization: This is critical. Use gloved fingers or a small, sterile dental cotton roll to stretch and stabilize the lip tautly. This flattens the tissue and allows for an even needle pass.
    4. Machine Setup and Power Settings: Set your machine for a relatively slow to medium speed. The specific power settings will depend on your machine and needle, but aim for controlled, deliberate movements.
    5. Needle Depth and Angle: This is where expertise shines. For mucosal tissue, a shallow tattoo needle depth is paramount—just deep enough to implant the pigment into the top layer of the dermis, but not so deep as to cause scarring or blowouts. A shallow angle, almost parallel to the skin, can also be beneficial.
    6. Lining Techniques: Use a single pass technique where possible to minimize trauma. If multiple passes are needed, ensure they are light and precise. Avoid overworking the area.
    7. Shading/Coloring Techniques: For designs requiring shading or filling, use smooth, consistent passes with a soft shader, always mindful of the delicate tissue.
    8. Wiping and Cleaning: Gently wipe away excess ink and blood with sterile distilled water or a non-alcoholic rinse during the process. Avoid harsh wiping.
    9. Finishing Touches and Inspection: Once complete, inspect the tattoo for evenness and saturation. Remove any stencil remnants.

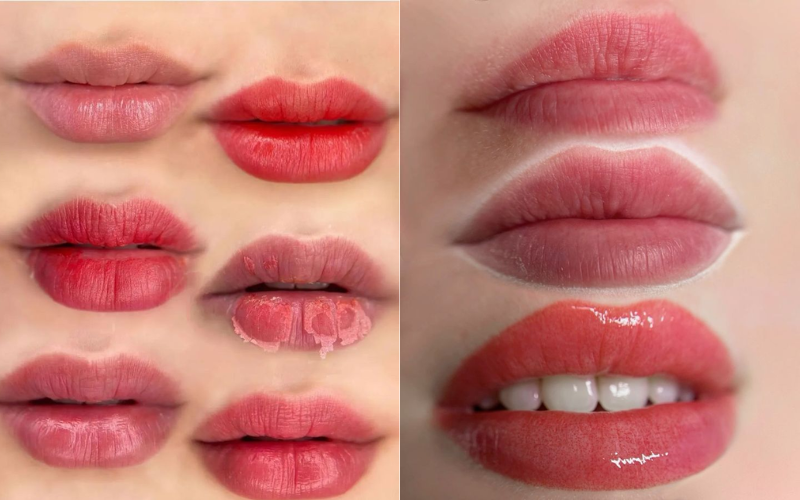
    Special Considerations for Middle Lip Tattoos

    While part of the “oral tattoo” family, middle lip tattoos (on the vermilion border or slightly inside it) present unique challenges. The tissue here transitions from mucous membrane to external skin, impacting ink retention. Pain sensitivity can vary. Stenciling remains difficult, and the visible nature of this area means even minor imperfections are more noticeable. Modified techniques often focus on lighter, more frequent passes, accounting for the tissue’s different absorption rates and the increased visibility during healing time variations.

    Inner Lip Tattoo Aftercare: Crucial for Longevity

    Inner lip tattoo aftercare is perhaps the most critical factor influencing its longevity and appearance. Proper care minimizes tattoo fading and promotes healthy healing. Provide clear, written aftercare instructions to every client. This is integral to client care and communication.

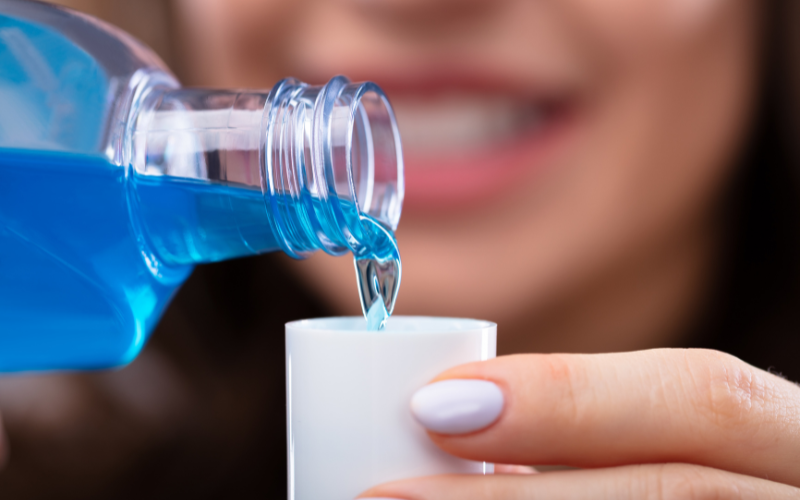
    • Immediate Post-Tattoo Instructions: Advise clients to rinse their mouth gently with non-alcoholic, antibacterial mouthwash or sterile saline solution after every meal and before bed for the first few days. Avoid hot, spicy, or acidic foods and drinks that could irritate the area.
    • Long-Term Aftercare Regimen: Continue gentle oral hygiene. Recommend avoiding excessive talking, touching the tattoo, and smoking or alcohol consumption during the initial healing phase.
    • What to Avoid: Spicy foods, extreme temperatures, direct sun exposure (post-healing, though less relevant for the inner lip), and picking at scabs.
    • Signs of Infection: Educate clients on symptoms like excessive swelling, redness, pus, fever, or increased pain, and instruct them on when to seek medical attention immediately.
    • Discussing Touch-ups: Prepare clients for the high probability of needing touch-ups due to the nature of the oral cavity. Frequent check-ins or follow-up appointments can be beneficial.

    Client Care and Communication

    Beyond the technical application, exceptional client care builds trust and manages expectations. Continuously re-emphasize the unique healing process and potential for fading of inner lip tattoos. 

    Many artists find it helpful to explore personal beauty journey insights from seasoned professionals and clients themselves – like those shared on ViviTag.com, a blog by the founder of the premium beauty brand Hivivi. Provide comprehensive, easy-to-understand written aftercare instructions, and be available for follow-up questions, reinforcing your commitment as a professional tattoo artist.

    Legal and Ethical Considerations

    Operating within legal and ethical bounds is paramount when performing any body art, especially in sensitive areas like the mouth. Always adhere strictly to age restrictions and verify ID. Be fully aware of your local and state regulations regarding oral tattoos, as some jurisdictions may have specific rules or even prohibit them. Ensure you have adequate professional insurance and liability coverage. Maintaining an impeccably sterile environment and strict adherence to cross-contamination prevention protocols are not just ethical responsibilities but often legal requirements.

    Frequently Asked Questions About Inner Lip Tattoos

    How long do inner lip tattoos last?

    Inner lip tattoos generally last anywhere from a few months to a few years before significantly fading. Due to the rapid cell regeneration and constant exposure to saliva, they are rarely truly “permanent.”

    Do inner lip tattoos hurt?

    Pain levels vary, but generally, inner lip tattoos are considered moderately painful. The area is dense with nerve endings, though the procedure is typically quick.

    What words/designs work best?

    Simple designs, single words, or small symbols with thick lines tend to work best and last longer due to the nature of the tissue and potential for blurring.

    Can inner lip tattoos always be removed?

    Because they typically fade significantly on their own, laser removal is less common and effective for outer skin tattoos. Fading often means they become almost invisible over time.

    How much do they cost?

    Pricing varies by artist skill, studio location, and design complexity, but generally, professional tattoo artist rates for inner lip tattoos can range from $50-$200.

    Conclusion

    Tattooing the inner and middle lip is a specialized art form that marries creativity with scientific precision. Mastering how to tattoo the middle and inner lip demands more than artistic talent; it requires a deep understanding of anatomy, meticulous sanitation, and clear client communication. By prioritizing safety, continuous learning, and adherence to best practices, artists can confidently navigate this unique niche, delivering quality results and upholding the highest professional standards. For those ready to either master this niche or refresh their skills, remember that diligence and expertise are your most valuable tools. Explore our professional tattoo supplies and resources to elevate your craft!

  • Your Ultimate Guide to the Lip Blush Healing Process

    Lip blush tattooing is the secret to waking up with perfectly tinted, defined, and fuller-looking lips every single day. This popular cosmetic treatment enhances your natural lip color and shape, giving you a beautiful, subtle wash of color without the need for daily lipstick application. It’s a wonderful solution for adding symmetry, correcting pale or uneven tones, and boosting your overall confidence.

    Setting Expectations: Understanding the Healing Journey

    While the results are stunning, it’s crucial to understand that the color you see immediately after your appointment is not the final result. The lip blush healing process is a journey with distinct stages. Patience is your most important tool, as your lips will go through several changes before revealing their true, beautifully healed color.

    What You’ll Learn in This Guide

    This comprehensive guide will walk you through everything you need to know about your lip blush recovery. We’ll break down the healing timeline stage by stage, provide a complete playbook of aftercare do’s and don’ts, and answer the most common questions to ensure your healing is smooth, successful, and stress-free.

    The Lip Blush Healing Timeline: A Day-by-Day (or Stage-by-Stage) Breakdown

    The lip tattoo healing process typically spans four to six weeks. Each phase is a normal and necessary part of your skin’s recovery. Here’s a detailed look at what you can expect.

    Immediately After Your Appointment (Day 1 – Hours 0-24)

    Right after your session, your lips will appear incredibly vibrant and bold. This is often called “shock color.” You’ll experience some lip blush swelling, redness, and tenderness, similar to a mild sunburn. The color will look much darker and more intense than your desired final shade. Your artist will instruct you to gently blot your lips with a clean, damp cotton pad to remove any lymph fluid, which helps prevent heavy scabbing.

    Days 2-3: The Darkening & Initial Scabbing Phase

    During this period, the pigment on your lips will oxidize, causing the color to appear even darker and more defined. Don’t panic! This is a completely normal part of the healing stages. You will start to feel your lips tighten as a thin film or light layer of lip blush scabbing begins to form. It’s essential to keep your lips moisturized with the recommended aftercare balm to keep them comfortable and protected.

    Days 4-7: The Peeling & Lightening Phase

    This is the lip blush peeling phase. The top layer of tattooed skin will begin to flake off naturally. It is absolutely critical that you do not pick, peel, or rub these flakes. Doing so can pull out the pigment prematurely and lead to patchy results. As the flakes come off, the color underneath will look very light, almost as if it has disappeared. This is known as the lip blush ghosting phase, where the color seems to fade significantly. Trust the process; this is temporary.

    Weeks 2-4: The Color Resurfacing & Settling Phase

    After the ghosting phase passes, you’ll start to see the magic happen. The lip blush color fading was just an illusion as new skin healed over the pigment. Now, the true color begins to bloom and resurface from the deeper layers of your skin. The lip blush color settling process continues as the pigment stabilizes. Your lips will feel much more like their normal selves, and the color will become richer and more defined each day.

    Weeks 4-8 (or longer): The Final Bloom & Full Results

    By the end of the first month, you’ll see your fully healed lip blush. The color will have softened into the beautiful, natural-looking tint you envisioned. This is the point when you and your artist can assess the results. A touch-up appointment is typically scheduled around 6-8 weeks after the initial session to perfect any areas that may have healed lighter and to make any desired adjustments to the color or shape.

    Essential Lip Blush Aftercare: Your Healing Playbook

    Following proper lip blush aftercare is just as important as choosing a skilled artist. Your diligence during the healing period directly impacts the longevity and beauty of your results.

    The “Do’s”: Best Practices for Optimal Healing

    • Gentle Cleaning: Gently rinse your lips with cool, distilled water and pat dry with a clean paper towel. Avoid rubbing. Follow your artist’s specific instructions for washing your lip tattoo.
    • Apply Balm Consistently: Keep your lips moisturized with the recommended lip blush healing balm. Apply a very thin layer multiple times a day to prevent dryness and protect the healing skin.
    • Stay Hydrated: Drink plenty of water and use a straw for all beverages, including water, for the first few days to avoid washing away your aftercare balm.
    • Sleep Smart: Try to sleep on your back with your head slightly elevated for the first couple of nights to help minimize swelling.
    • Protect from the Sun: Once the peeling phase is complete, protect your lips with a high-quality SPF for lip blush daily to prevent the color from fading.

    The “Don’ts”: What to Avoid During Healing

    • NO Picking: Never pick, peel, or scratch the scabs or flaky skin. Let them fall off naturally.
    • Avoid Excess Moisture: Stay away from pools, saunas, long steamy showers, and intense workouts that cause heavy sweating for at least 10-14 days.
    • Mind Your Food: Avoid salty, spicy, oily, or acidic foods that can irritate the sensitive skin on and around your lips.
    • No Makeup or Kissing: Do not apply any makeup (lipstick, gloss) to your lips until they are fully healed. Avoid kissing to prevent infection and friction.
    • Postpone Dental Work: Try to avoid any dental appointments for at least 3-4 weeks after your procedure.

    Preventing Infection: Signs and Symptoms

    Normal healing involves swelling, tenderness, and flaking. However, it’s important to know the lip blush infection signs. If you experience excessive green or yellow discharge, severe pain that worsens over time, a hot sensation, or fever, contact your artist and a medical professional immediately.

    Common Questions & Concerns During Healing

    “Why is my color so dark/bright initially?”

    The initial bold color is due to a combination of fresh pigment and slight inflammation. As the skin heals and the pigment settles, the lip blush color change will be significant, with the final shade being about 30-50% softer and lighter.

    “My lips look like the color disappeared, is this normal?”

    Yes, this is the “ghosting” phase. It happens when the initial scabs fall off, and a new layer of skin conceals the pigment. Be patient; the color will bloom back to the surface over the next few weeks as your skin fully regenerates.

    “How much swelling is normal?”

    Some degree of swelling is completely normal and expected. For most people, lip tattoo swelling normal lasts for 24 to 48 hours. Using a gentle, indirect cold compress can help provide relief.

    “What if I get cold sores?”

    If you have ever had a cold sore (herpes simplex virus), the procedure can trigger an outbreak. It is vital to consult your doctor for an antiviral medication to take before and after your appointment to prevent this. A lip blush cold sore outbreak can affect pigment retention.

    “Can I wear lipstick during healing?”

    No. Applying any makeup to your lips before they are fully healed (typically 10-14 days) can introduce bacteria, cause an infection, and disrupt the pigment, leading to poor results. Wait until your artist gives you the all-clear.

    “When can I get a touch-up?”

    A lip blush touch up is usually required 6-8 weeks after your first session. This allows your lips to heal completely and the color to fully settle, so your artist can assess and perfect the final look.

    Long-Term Care & Maintaining Your Lip Blush

    Protecting Your Investment

    To ensure great lip blush longevity, consistent care is key. Always use a lip balm with SPF to protect your lips from sun exposure, which is the primary cause of premature fading. For added support, Hivivi offers professional aftercare products tailored for permanent makeup. Also, try to avoid applying harsh exfoliants or anti-aging products directly on your tattooed lips.

    When to Consider a Refresher/Color Boost

    Lip blush typically lasts 1-3 years. Factors like your skin type, lifestyle, and sun exposure affect how quickly it fades. When you notice the color has significantly lightened, it’s time to book an appointment to refresh your lip blush and bring the vibrancy back.

    Conclusion: Beautiful, Healed Lips Await

    The lip blush healing journey requires a little patience and a lot of care, but the payoff is beautifully natural and effortlessly chic lips. By following the proper aftercare and trusting the process, you’ll achieve the gorgeous, long-lasting results you desire. Always consult your artist with any specific questions.

  • A Complete Guide to the Different Types of Eyebrow Tattoo

    Tired of filling in your brows every morning? The desire for perfect, symmetrical eyebrows has led many to explore the world of semi-permanent makeup. Eyebrow tattoos offer a long-lasting solution that saves time and boosts confidence. But with so many techniques available, choosing the right one can feel overwhelming. This guide will walk you through the most popular types of eyebrow tattoo, helping you understand each method to find your perfect match.

    Understanding the Core Differences: Permanent vs. Semi-Permanent

    When most people hear eyebrow tattoo, they might imagine the harsh, blocky brows of the past. Modern cosmetic tattooing, however, is a different art form altogether. Unlike traditional tattoos that use ink and go deep into the skin, today’s semi-permanent eyebrow makeup uses specialized pigments implanted into the superficial layers of the skin. This means the color will naturally and gradually fade over time, allowing for adjustments as your face and style preferences change. This fading process is why semi-permanent methods are the preferred choice for a natural and flattering brow enhancement.

    The Main Types of Eyebrow Tattoos: A Detailed Guide

    The world of PMU (Permanent Makeup) brows is diverse. Each technique offers a unique finish, and the best one for you depends on your skin type, lifestyle, and aesthetic goals. Let’s break down the leading options.

    Microblading: The Hair-Stroke Revolution

    Microblading is a manual technique that uses a handheld tool with a row of tiny needles to create crisp, fine lines that mimic natural brow hair. This is one of the most well-known brow tattoo techniques for achieving a hyper-realistic look.

    • Best For: Individuals with normal to dry skin who have sparse areas and want to add fullness with a very natural, no-makeup appearance.
    • Pros: Creates incredibly realistic hair-stroke brows that blend seamlessly with your existing hair.
    • Cons: Not ideal for oily skin, as the strokes can blur or fade quickly. Requires regular touch-ups to maintain crispness.
    • Longevity: Typically lasts 1 to 2 years before a color boost is needed.

    Ombre Powder Brows: The Soft, Shaded Effect

    Unlike microblading, the ombre brow technique is performed with a digital machine that deposits tiny dots of pigment into the skin, creating a soft, pixelated finish similar to brow powder. The look is a gradient, starting lighter at the front of the brow and gradually getting darker towards the tail.

    • Best For: All skin types, including oily skin where microblading may not hold. It’s perfect for those who prefer a more defined, makeup look.
    • Pros: Excellent pigment retention and longevity. It’s gentler on the skin than microblading and provides a beautifully sculpted shape.
    • Cons: The look is less like individual hairs and more like a filled-in powder finish, which may appear bolder initially.
    • Longevity: Can last 2 to 3 years, making it a very durable option.

    Combination Brows: The Best of Both Worlds

    As the name suggests, combination brows merge two techniques into one. This method typically involves creating hair strokes with microblading or a machine at the beginning of the brow, then seamlessly blending into powder shading through the middle and tail. The result is the ultimate eyebrow enhancement procedure.

    • Best For: Almost anyone! It’s great for those with sparse brows who want the natural texture of hair strokes but need the added density and definition of shading.
    • Pros: Offers both natural-looking texture and beautiful definition, providing a versatile, fluffy yet full look.
    • Cons: The procedure can be slightly longer and might come at a higher price point due to the dual techniques involved.
    • Longevity: Very good, typically lasting 2-3 years.

    Nanobrows: Precision Redefined

    Nanobrows, or nano hair strokes, are the next evolution in realistic brow tattooing. Using a nano brows machine with a single, ultra-fine needle, an artist creates precise hair strokes that can be even finer and more realistic than microblading. This method causes less trauma to the skin.

    • Best For: All skin types, including oily and sensitive skin. It’s for anyone seeking the most delicate and realistic hair-stroke results possible.
    • Pros: Less invasive and painful than microblading, offers better pigment retention, and minimizes the risk of scarring.
    • Cons: It is a highly advanced technique, so it can be more expensive and harder to find a truly skilled artist.
    • Longevity: Excellent, often lasting 2-3 years.

    Factors to Consider When Choosing Your Eyebrow Tattoo Type

    Making the right choice goes beyond just a photo you like. Consider these key factors:

    • Skin Type: This is the most crucial factor. Oily skin often causes microblading strokes to blur, making Ombre Powder or Nanobrows a better choice for better pigment retention brows. Dry to normal skin is suitable for all techniques.
    • Desired Look: Are you seeking subtle, natural hair strokes or a more defined, filled-in makeup effect? Your answer will point you directly toward either a hair-stroke method like microblading/nano or a shaded method like powder brows.
    • Artist’s Expertise: Not all artists are masters of every technique. Find a specialist whose portfolio showcases consistently beautiful, healed results in the style you desire.

    The Process and Aftercare: What to Expect

    Regardless of the type of eyebrow tattoo you choose, the process is similar. It begins with a thorough consultation and brow mapping to design your perfect shape. A topical numbing cream is applied for comfort before the artist begins the pigment application. Afterwards, following the eyebrow tattoo aftercare instructions is critical for healing. This usually involves keeping the brows clean and dry, avoiding sun exposure, and applying a special ointment. Proper care ensures your investment heals beautifully and lasts as long as possible.

    Choosing a Qualified Artist to Ensure Safe, Beautiful Results

    The single most important decision you’ll make is choosing your brow artist. The quality of their work determines both your results and your safety. It’s worth researching certified eyebrow tattoo specialists with strong portfolios, glowing reviews, and a proven commitment to hygiene and artistry.

    Conclusion: Finding Your Perfect Brows

    From the hyper-realism of Nanobrows to the soft definition of Ombre Powder, there is a perfect eyebrow tattoo solution for everyone. By understanding the core differences between each technique and considering your personal skin type and aesthetic goals, you can make an informed decision. The final step is to find an artist you trust to bring your vision to life. Ready to wake up with flawless brows every day?